Why is the AASHTO Accreditation Important for Your Company?

Achieving AASHTO Accreditation is a significant milestone for any construction materials testing laboratory. It signifies a commitment to quality, competence, and compliance with nationally recognized standards. This accreditation is not just a badge of honor; it’s a critical factor that can influence project approvals, client trust, and overall business success.

What is AASHTO Accreditation?

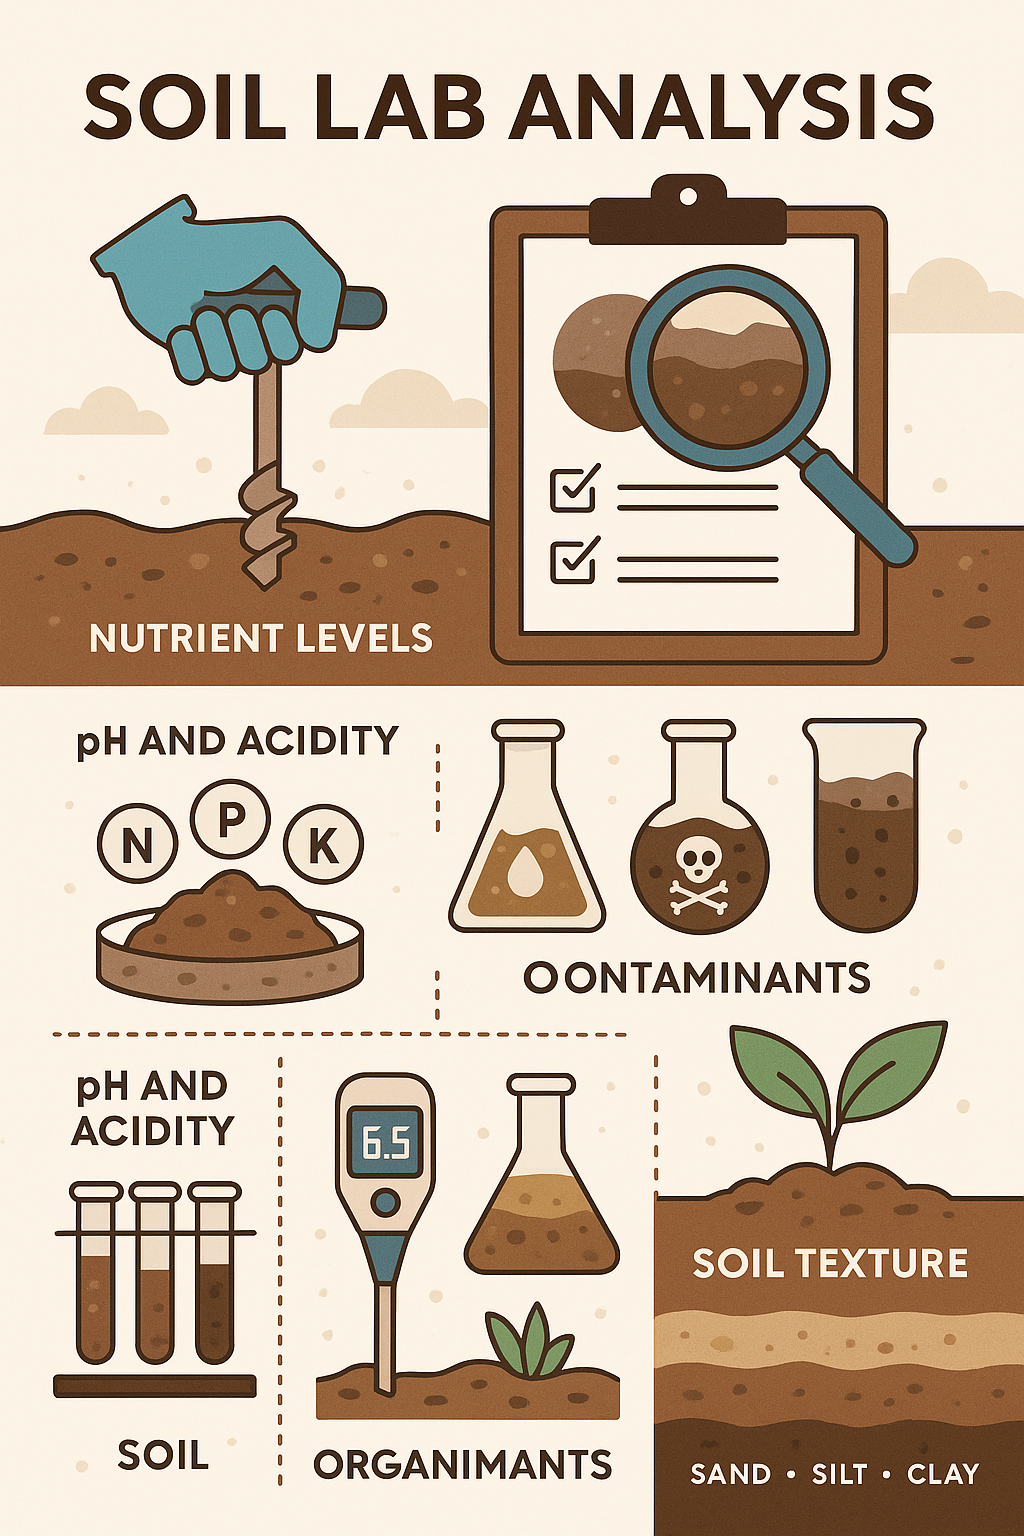
The American Association of State Highway and Transportation Officials (AASHTO) Accreditation Program (AAP) formally recognizes laboratories competent in testing construction materials. Managed by AASHTO re:source, the program ensures that laboratories meet specific standards, including AASHTO R18 and relevant ASTM standards, through rigorous assessments and proficiency testing.


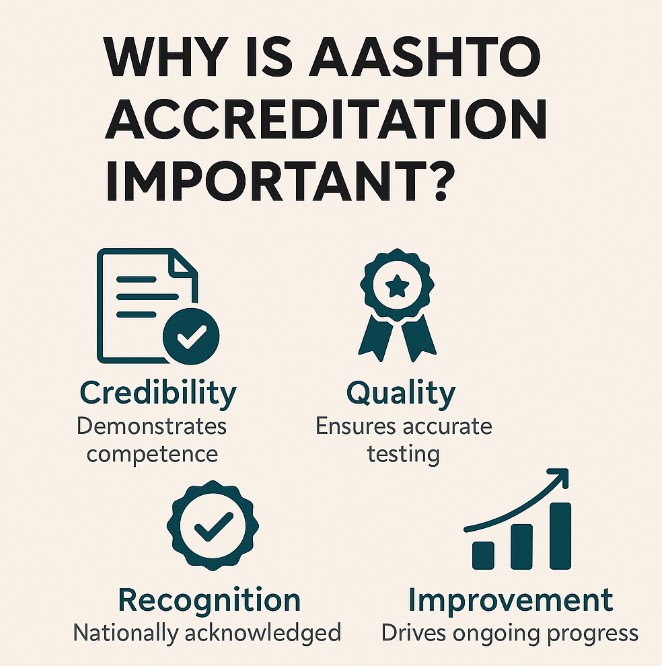
Why Does AASHTO Accreditation Matter?

1. Assurance of Quality and Competence

AASHTO Accreditation assures clients and stakeholders that a laboratory adheres to strict quality management systems and testing procedures. It demonstrates a lab’s commitment to producing reliable and accurate test results, which is crucial for infrastructure projects where material performance is paramount.

2. Regulatory Compliance and Market Access

Many state Departments of Transportation (DOTs) and federal agencies require AASHTO Accreditation for laboratories involved in public infrastructure projects. Without this accreditation, a laboratory may be ineligible to participate in certain projects, limiting business opportunities.

3. Competitive Advantage with an AASHTO Accredited lab

Accreditation differentiates a laboratory in a competitive market. It signals to clients that the lab meets high standards, potentially leading to increased trust, more contracts, and the ability to command premium pricing for services.


AASHTO Accreditation

Step-by-Step Guide to Achieving AASHTO Accreditation

Step 1: Register Your Laboratory with AASHTO Resource

Begin by registering your laboratory with AASHTO re:source. This process involves providing basic information about your lab and the types of testing services you offer. Registration is the first formal step toward accreditation

Step 2: Develop a Quality Management System (QMS)

Implement a QMS that complies with AASHTO R18 standards. This system should document procedures, equipment calibration, personnel qualifications, and other quality-related processes. A robust QMS is the backbone of a successful accreditation.

Step 3: Schedule an On-Site Assessment

Request an on-site assessment through AASHTO re:source. During this visit, assessors will evaluate your laboratory’s facilities, equipment, personnel, and adherence to testing standards. They will identify any nonconformities that need to be addressed.

Step 4: Participate in the Proficiency Sample Program (PSP)

Enroll in the PSP, which involves testing standardized samples and submitting results for evaluation. This program assesses your laboratory’s testing accuracy and consistency compared to peer labs.

Step 5: Address Nonconformities

If the on-site assessment or PSP identifies any nonconformities, develop and implement corrective actions. Submit documentation demonstrating how these issues have been resolved to AASHTO re:source within the specified timeframe.

Step 6: Maintain AASHTO Accreditation

Once accredited, maintain compliance by:

  • Continuously adhering to your QMS
  • Participating in regular proficiency testing
  • Undergoing periodic reassessments
  • Keeping up-to-date with changes in testing standards

Real-World Impact: Case Study

Consider a laboratory in Houston, Texas, seeking to participate in state-funded highway construction projects. Without AASHTO Accreditation, the lab may be excluded from bidding on these projects. By achieving accreditation, the lab not only gains access to these opportunities but also enhances its reputation, leading to increased business from private sector clients who value accredited testing services.

AASHTO Accreditation is more than a certification; it’s a testament to a laboratory’s dedication to quality and excellence in construction materials testing. By following the structured accreditation process, laboratories can unlock new business opportunities, ensure compliance with regulatory requirements, and build lasting trust with clients.

Moisture Content: The Gold Standard for Reliable Lab Results

🌡️ Moisture Content Determination: Oven Drying Method (ASTM D2216)

What Is the Oven Drying Method?

The Oven Drying Method is the most commonly used and accurate technique for determining the moisture content of soils, as defined by ASTM D2216. This method involves drying a soil sample in a controlled-temperature oven (typically at 110 ± 5°C) until it reaches a constant mass, allowing for precise measurement of the amount of water originally present in the sample.


Why Is Moisture Content Important?

In geotechnical engineering, knowing the moisture content of soil is essential for:

  • Classifying soil types
  • Evaluating compaction efficiency
  • Designing foundations and retaining structures
  • Predicting settlement or shrink-swell behavior
  • Assessing strength, permeability, and consolidation

Accurate moisture content values are foundational for calculations involving plastic and liquid limits, dry density, and shear strength.


Equipment Required

  • Laboratory oven (110 ± 5°C)
  • Precision balance (0.01 g sensitivity)
  • Moisture cans with lids
  • Spatula or scoop
  • Desiccator (optional for cooling samples before weighing)

Step-by-Step Procedure

  1. Sample Preparation
    • Place a representative sample of moist soil in a clean, dry moisture can.
    • Weigh the can and wet soil. Record as W₁ (wet weight).
  2. Drying
    • Place the can (uncovered) in an oven set at 110 ± 5°C.
    • Dry the sample for 12–24 hours, or until it reaches constant weight.
  3. Final Weighing
    • Remove the can from the oven and allow it to cool in a desiccator or room-temperature environment.
    • Weigh the can and dry soil. Record as W₂ (dry weight).
  4. Empty Can Weight
    • Weigh the empty can separately if not already known. Record as W₀.

Moisture Content Calculation

Moisture Content Determination Oven Drying Method ASTM D-2216

Key Considerations

  • Ensure the oven temperature remains stable at 110 ± 5°C.
  • Do not overheat organic soils or gypsum-rich soils—use a lower drying temperature (~60°C) if needed.
  • Avoid contamination and moisture loss during weighing.
  • Use desiccators to avoid reabsorption of moisture before weighing.

For a visual demonstration of the Moisture Content Determination Oven Drying Method Test, you might find this video helpful:

Moisture Content Determination Oven Drying Method

Contact us today to build your next project.

Send an Email


Office

CMT
10665 Richmond Ave, Ste 190
Houston, Texas 77042

Hours

Mon-Fri: 7am – 6pm
Sat: 8am – 5pm
Sun: Closed

Communicate

Email: [email protected]
Phone: (832) 464-8334

Uncover Speedy Moisture Test While In The Field – 2025


In the world of construction materials testing, accuracy and efficiency are paramount, especially when it comes to understanding the moisture content of soils and aggregates. One tool that continues to prove indispensable on job sites is the Speedy Moisture Test. This portable device allows technicians to quickly and reliably determine moisture content, a critical factor in compaction control, soil stability, and overall project quality.

This article outlines the proper procedure for using a Speedy Moisture Tester, along with best practices to ensure reliable and repeatable results in the field.


Why Speedy Moisture Tests Matter

Moisture content directly affects the compaction and strength of soils and aggregates. Excess moisture can lead to poor compaction, settlement issues, and even structural failures. Insufficient moisture, on the other hand, can prevent materials from reaching the desired density. That’s why accurate moisture determination is essential for quality control in construction projects—whether it’s for embankments, roadways, foundations, or backfills.

Understanding the Speedy Moisture Test

The Speedy Moisture Tester is a pressure-based device that measures the moisture content of a soil sample by reacting calcium carbide with water in the sample. The chemical reaction produces acetylene gas, and the resulting pressure correlates with the moisture content. The process is fast, typically taking just a few minutes, making it a preferred method for field use.


Step-by-Step Procedure for Using the Speedy Moisture Tester

1️⃣ Preparing the Speedy Moisture Test Equipment

Ensure the Speedy Moisture Tester is clean and in good working condition.

Verify that the pressure gauge or dial is set to zero.

Have the appropriate calcium carbide reagent capsules or powder ready.

2️⃣ Weigh the Moisture Sample

Use the supplied scale or a calibrated balance to weigh the correct amount of sample (typically 20g or 26g, depending on the tester’s model and scale).

Place the weighed sample into the tester’s pressure vessel.

3️⃣ Add the Reagent

Carefully add two or three scoops (or capsules) of calcium carbide reagent to the vessel’s cap or chamber.

Avoid spilling or contaminating the reagent.

4️⃣ Seal the Vessel

Securely close the tester’s cap, ensuring the gasket is seated properly to avoid leaks.

5️⃣ Shake to React

Hold the tester horizontally and shake vigorously for at least 30 seconds to mix the reagent and sample thoroughly.

Rotate and invert the tester to ensure full distribution of the reagent.

6️⃣ Read the Gauge

Allow the reaction to stabilize (usually 3–5 minutes).

Record the pressure reading from the gauge, which corresponds to the moisture content. Use the conversion chart or scale provided by the manufacturer.

7️⃣ Calculate and Report the Speedy Moisture Test Results

Adjust the moisture content for any corrections (e.g., stone content) as required by your testing standards.

Record results clearly, including sample weight, gauge reading, calculated moisture content, and any observations.


Best Practices for Reliable, Speedy Moisture Test Results

Use Fresh Reagents: Calcium carbide can degrade over time. Always check the shelf life and store it in a dry, sealed container.

Sample Handling: Ensure the sample represents the material being tested. Avoid contamination or segregation.

Temperature Considerations: Extreme temperatures can affect reaction rates. Follow manufacturer guidelines for temperature limits.

Calibration: Periodically verify the Speedy Moisture Tester against a standard moisture determination method, such as oven drying per ASTM D2216.

Safety First: Always handle calcium carbide in a well-ventilated area and follow safety precautions. Wear gloves and eye protection, as the reagent is reactive and can cause burns.


Construction Material Testing

Plastic Limit Test Explained: How to Prevent Soil Failure on Site

🎥 Plastic Limit Test Overview

Purpose:
The Plastic Limit Test determines the lowest moisture content at which a soil remains plastic. It’s a critical parameter in classifying fine-grained soils and assessing their behavior under varying moisture conditions.

Standards Referenced:

  • ASTM D4318: Standard Test Methods for Liquid Limit, Plastic Limit, and Plasticity Index of Soils
  • AASHTO T90: Standard Method of Test for Determining the Plastic Limit and Plasticity Index of Soils

🧪 Equipment Required

  • Glass Plate or Plastic-Coated Surface: Provides a non-porous surface for rolling soil threads.
  • Moisture Cans: Used to determine the moisture content of soil samples.
  • Spatula or Putty Knife: Assists in mixing and handling soil samples.
  • Porcelain Evaporating Dish: For mixing soil with water.
  • Balance (±0.01 g accuracy): Measures the weight of soil samples accurately.
  • Oven (110 ±5°C): Dries soil samples to determine moisture content.
  • Sieve #40 (425 µm): Ensures soil particles are of appropriate size for testing.
  • Distilled Water: Used to moisten soil samples to the desired consistency.

🧪 Test Procedure

  1. Sample Preparation:
    • Sieve the soil through a No. 40 sieve.
    • Take about 20g of the passing soil and mix it with distilled water until it becomes a cohesive mass.
  2. Thread Rolling:
    • Roll a portion of the soil on the glass plate into threads approximately 3.2 mm (1/8 inch) in diameter.
    • If the soil crumbles at this diameter, it’s considered at its plastic limit.
  3. Moisture Content Determination:
    • Collect crumbled pieces and place them in moisture cans.
    • Weigh, dry in an oven for 24 hours, and reweigh.
    • Calculate moisture content for each trial and average the results.

📊 Calculations

Atterberg Limit Tests - Liquid Limit and Plastic Limit Test Procedure

The average moisture content of the samples at the point of thread crumbling is reported as the Plastic Limit (PL).


📈 Interpreting Results

  • Low Plastic Limit (<15%): Indicates silty or non-plastic soil.
  • Medium Plastic Limit (15–30%): Typical for lean clays.
  • High Plastic Limit (>30%): Suggests fat clays with high swelling potential.

These values are used to compute the Plasticity Index (PI): PI=Liquid Limit (LL)

Compute the Plasticity Index pi

🏗️ Engineering Applications

  • Roadway Design: Determines subgrade suitability and need for soil stabilization.
  • Foundation Design: Assesses compressibility and shrink-swell behavior.
  • Slope Stability: Helps evaluate residual shear strength in cohesive soils.
  • Soil Improvement: Guides chemical stabilization, such as lime or cement treatment.

For a visual demonstration of the Plastic Limit Test, you might find this video helpful: Atterberg Limit

Tests – Liquid Limit and Plastic Limit Test Procedure

Contact us today to build your next project.

Send an Email


Office

CMT
10665 Richmond Ave, Ste 190
Houston, Texas 77042

Hours

Mon-Fri: 7am – 6pm
Sat: 8am – 5pm
Sun: Closed

Communicate

Email: [email protected]
Phone: (832) 464-8334

Mastering the Sieve Analysis Wash Method: Reliable Results Every Time

Sieve Analysis Wash Method (ASTM D1140)

Purpose Sieve Analysis Wash Method

The Sieve Analysis Wash Method is employed to accurately determine the percentage of soil particles finer than the 75-µm (No. 200) sieve. This wet sieving technique is particularly effective for soils containing a significant amount of fine particles that may adhere to coarser grains, which dry sieving might not efficiently separate.


Equipment Required

  • Balance: Sensitive to 0.1 g
  • Sieve Set: Including a No. 200 (75-µm) sieve
  • Wash Bottle or Gentle Water Source
  • Drying Oven: Capable of maintaining 110 ± 5°C
  • Evaporating Dish or Suitable Container
  • Mortar and Pestle: For pulverizing soil lumps
  • Dispersing Agent: Such as a 2% sodium hexametaphosphate solution (for Method B)

Test Methods Overview

ASTM D1140 outlines two methods:

  • Method A: For non-cohesive soils with little to no plasticity. The sample is soaked in water to facilitate separation.
  • Method B: For cohesive soils with plastic fines. The sample is soaked in a dispersing solution to aid in disaggregation.

Step-by-Step Procedure

  1. Sample Preparation
    • Obtain a representative soil sample and dry it in the oven at 110 ± 5°C until a constant weight is achieved.
    • Record the dry mass (W₀) of the sample.
  2. Soaking
    • Method A: Place the dried sample in a container and add sufficient water to cover it. Soak for at least 10 minutes.
    • Method B: Place the dried sample in a container and add a dispersing solution. Soak for at least 10 minutes to ensure thorough dispersion of fine particles.
  3. Washing
    • Pour the soaked soil slurry over a nest of sieves, with the No. 200 sieve at the bottom.
    • Gently agitate and rinse the material using a wash bottle or gentle water stream.
    • Continue washing until the water passing through the sieve is clear, indicating the removal of fine particles.
  4. Drying
    • Collect the material retained on the No. 200 sieve.
    • Dry the retained material in the oven at 110 ± 5°C until a constant weight is achieved.
    • Record the dry mass (W₁) of the retained material.
  5. Calculation

Significance in Geotechnical Engineering

Sieve Analysis Wash Method ASTM D1140

Understanding the proportion of fine particles in soil is crucial for:

  • Soil Classification: Helps in determining the soil type and its suitability for construction projects.
  • Permeability Assessment: Fine particles affect the soil’s ability to transmit water.
  • Compaction Characteristics: Influences the soil’s compaction behavior and stability.
  • Foundation Design: Affects the bearing capacity and settlement characteristics of soils.

Safety and Quality Considerations

  • Ensure all equipment is clean and free from previous test residues.
  • Handle sieves carefully to prevent damage to the mesh.
  • Use appropriate personal protective equipment (PPE) when handling dispersing agents and during the drying process.

For a visual demonstration of the Sieve Analysis Wash Method, you might find this video helpful:

Materials Finer than the No. 200 Sieve by Washing

Contact us today to build your next project.

Send an Email


Office

CMT
10665 Richmond Ave, Ste 190
Houston, Texas 77042

Hours

Mon-Fri: 7am – 6pm
Sat: 8am – 5pm
Sun: Closed

Communicate

Email: [email protected]
Phone: (832) 464-8334

Grain Size Analysis: How to Understand the Minus #200 Sieve Test

Grain size analysis plays a pivotal role in geotechnical engineering and construction materials testing. One of the most important procedures used to classify fine-grained soils is the Minus #200 test, also referred to as the wash sieve test. While often overshadowed by full gradation analysis, this simple yet powerful method is essential in understanding the percentage of material finer than the No. 200 (75 µm) sieve.

In this article, we’ll break down the unique procedure, purpose, and interpretation of the Minus #200 test—commonly used across construction sites, soils labs, and quality control operations to support compaction, stability, and site development decisions.


Why the Minus #200 Test Matters

The No. 200 sieve separates silt- and clay-sized particles from sand and gravel. These fine particles significantly influence a soil’s plasticity, drainage characteristics, and load-bearing capacity. Soils with a high percentage of fines can trap moisture, reduce permeability, and lead to soft or unstable conditions under load.

From a construction standpoint, identifying the percentage of fines informs decisions about:

  • Soil stabilization methods (e.g., lime or cement treatment)
  • Compaction effort required
  • Drainage design
  • Site work suitability

Materials and Equipment Needed

To ensure accuracy and repeatability, the following items are required:

  • #200 (75 μm) standard sieve
  • Drying oven (set to 110 ± 5°C)
  • Balance readable to 0.01 g
  • Wash pan (typically flat-bottomed)
  • Graduated cylinder (optional for sedimentation observation)
  • Clean water source
  • Squeeze bottle and plastic beaker
  • Desiccator (optional)

Step-by-Step Minus #200 Test Procedure

This test is typically performed according to ASTM D1140, but labs may adapt procedures based on material type or project-specific requirements. Here is a general procedure tailored for accuracy and clarity:

1. Prepare the Soil Sample for Grain Size Analysis

Obtain a representative soil sample and air dry it, ensuring clumps are gently broken down without crushing aggregate particles. A typical test requires 50 to 100 grams of minus #4 material.

2. Initial Weighing

Record the dry mass of the sample to the nearest 0.01 gram. This value will be used as the baseline for calculating the percentage passing the No. 200 sieve.

3. Wash the Minus #200 Sample

Place the sample in a wash pan. Using clean water, agitate and decant over a No. 200 sieve until the water runs clear. The goal is to remove all particles finer than 75 µm.

Pro tip: Using a squeeze bottle or swirling method ensures fines are effectively washed without excessive water use.

4. Oven Dry the Retained Material

After washing, place the remaining material (from the pan and sieve) in a drying oven at 110 ± 5°C until it reaches a constant mass. This typically takes 12–16 hours.

5. Final Weighing

Once dried, weigh the retained material. The difference between the original mass and the post-wash mass represents the weight of the minus #200 material.

6. Calculations

Use the following formula:

% Finer than No. 200 = [(Initial Mass – Retained Mass) / Initial Mass] × 100

This percentage is reported as the amount of material finer than the #200 sieve.


Interpreting the Minus #200 Results for Grain Size Analysis

A high percentage of minus #200 material often indicates poor drainage, increased plasticity, and a potential for shrink/swell issues. In many specifications, particularly for subgrade or base material, a maximum percentage passing the #200 sieve is strictly defined—typically not exceeding 12–15%.

Exceeding these limits may require:

  • Replacing material
  • Treating with chemical stabilizers
  • Increasing compaction standards

Common Mistakes and Best Practices for Grain Size Analysis

Insufficient Washing: Not thoroughly agitating fines off sand particles leads to under-reporting.

Loss of Sample: Careful handling is essential during decanting to prevent sample loss.

Incomplete Drying: Weighing a damp sample will skew final results.

Inconsistent Sample Size: Ensure test material is representative of field conditions.


When to Use the Minus #200 Test

This test is commonly used in:

  • Field quality control for base and subgrade materials
  • Borrow pit evaluations
  • Stabilization project design
  • Soil classification in geotechnical investigations

Final Thoughts for Grain Size Analysis

While simple in execution, the Minus #200 test delivers critical insight into a soil’s engineering behavior. It’s especially useful when full sieve analysis is unnecessary or when verifying compliance with specifications. A well-executed test helps teams avoid costly failures, over-treatment, or project delays caused by unsuitable fines content.

For any contractor, engineer, or lab tech—mastering the minus #200 procedure is a small investment in time with a big return in quality assurance.


Need help with materials testing? Our AASHTO-accredited laboratory specializes in soil classification, compaction testing, and field quality control for public and private projects. Contact us today to learn more.

Soil Classification Starts Here: The Truth About Atterberg Limits

Understanding Atterberg Limits: The Key to Soil Classification and Engineering

Introduction to Atterberg Limits

Atterberg Limits are a fundamental concept in soil mechanics and geotechnical engineering, helping professionals determine the critical moisture levels at which soil changes its behavior. Developed by Albert Atterberg, these limits define the plasticity and consistency of fine-grained soils, particularly clay and silt. Understanding Atterberg Limits is essential in soil classification, foundation design, and earthwork projects, ensuring structural stability and long-term performance.

What Are the Atterberg Limits?

Atterberg Limits consist of three key tests that measure the moisture content at different states of soil consistency:

  1. Liquid Limit (LL) – The moisture content at which soil transitions from a plastic to a liquid state.
  2. Plastic Limit (PL) – The moisture content where soil moves from a semi-solid state to a plastic state.
  3. Shrinkage Limit (SL) – The moisture content at which further drying of soil no longer results in volume reduction.

These limits are used to determine the Plasticity Index (PI), which is calculated as PI = LL – PL. This index helps in understanding soil behavior under different conditions, making it a crucial factor in civil engineering projects.

Importance of Atterberg Limits in Soil Classification

The Unified Soil Classification System (USCS) and AASHTO Soil Classification System both utilize Atterberg Limits to categorize fine-grained soils based on their plasticity characteristics. These classifications help engineers and contractors select appropriate construction materials for roadway subgrades, foundations, and embankments.

High Plasticity Index values indicate soils that expand and contract significantly with moisture changes, which can lead to foundation instability. Conversely, soils with low plasticity are more stable, making them ideal for load-bearing structures.

Testing Procedures for Atterberg Limits

Performing Atterberg Limits tests requires standardized laboratory procedures to ensure accurate results. The liquid limit test is typically conducted using a Casagrande device or a fall cone apparatus, while the plastic limit test involves rolling soil into thin threads until it crumbles. The shrinkage limit test measures the minimum moisture content before soil volume ceases to shrink.

These tests are critical in geotechnical investigations, allowing engineers to evaluate soil suitability for specific projects and mitigate risks associated with settlement, heaving, and erosion.

Applications of Atterberg Limits in Engineering

Atterberg Limits play a vital role in several engineering applications, including:

  • Foundation Design: Identifying soil plasticity helps determine bearing capacity and potential movement due to moisture fluctuations.
  • Pavement Construction: High plasticity soils may require stabilization before being used as subgrades for roadways and highways.
  • Slope Stability Analysis: Understanding soil consistency aids in predicting landslide risks and implementing erosion control measures.
  • Dams and Embankments: Engineers analyze Atterberg Limits to design structures that withstand hydraulic forces and prevent failure.

Atterberg Limits and Soil Stabilization

Soils with excessive plasticity often require modification or stabilization to enhance their performance. Common methods include:

  • Lime Stabilization: Reduces plasticity by reacting with clay minerals, improving soil strength.
  • Cement Stabilization: Binds soil particles together, reducing swelling and shrinkage.
  • Chemical Additives: Polymers and fly ash can alter soil properties to meet engineering requirements.

Conclusion: Why Atterberg Limits Matter

Understanding Atterberg Limits is crucial for geotechnical engineers, construction professionals, and soil scientists. These tests provide essential data for soil classification, construction planning, and risk assessment, ensuring that infrastructure projects are built on stable and reliable ground. By accurately determining the plasticity and moisture sensitivity of soils, Atterberg Limits help engineers prevent failures, reduce costs, and enhance the longevity of structures.

By incorporating Atterberg Limits testing into geotechnical investigations, professionals can make informed decisions, ensuring safe, efficient, and durable construction in diverse environmental conditions.

CMT Services Exposed: The Silent Defenders of Construction Quality

About CMT Services

CMT Services by Construction Materials Testing (CMT) services are essential for ensuring the safety, durability, and compliance of any project site—whether it’s a towering high-rise, a highway expansion, or a industrial development.

Our certified technicians and seasoned engineers don’t just follow the standards—they challenge them, bringing precision, innovation, and a passion for quality to every test and inspection. We thrive on pushing boundaries and solving complex site challenges with clarity and confidence. To help you better understand how CMT fits into your project, we’ve answered some of the most frequently asked questions below.

Can you provide on-site lab services if needed?

Yes. We offer:

•Mobile labs or jobsite trailers
•Satellite curing facilities
•On-site CMT services for testing on fast-paced projects

Do you have enough staff and equipment to handle a project of this size?

Yes. We maintain:

•Scalable field and lab technician teams
•Redundant equipment for surge capacity
•Regional support to ensure uninterrupted coverage

What is your availability for field testing (nights, weekends, remote areas)?

CMT services are Available 24/7, including:

•Night pours or weekend shifts
•Emergency mobilization
•Remote and rural site coverage

How do you track and archive CMT services data for future audits or disputes?

•All test data is digitally archived with metadata
•Secure cloud-based storage or internal servers
•Easily retrievable for project closeouts, litigation, or QA audits

How are test results for CMT services communicated and how quickly?

•Preliminary results: often same-day (e.g., slump test, field density)
•Final reports: typically within 24–48 hours
•Results are sent via email or uploaded to client portals

Additional CMT Services Frequently Asked Questions

Can test reports be integrated with project management software or shared digitally?

Yes. We can:

•Export PDF or Excel reports
•Integrate with systems like Procore, e-Builder, or SharePoint
•Set up automated report distribution

How do you test for core extraction or compaction?

Cores are drilled from the pavement, trimmed, and weighed. Density is calculated and compared to design or target compaction specs.

What tests are done to verify asphalt mix design (e.g., Marshall, Superpave)?

•Marshall: Stability, flow, density, air voids
•Superpave (Gyratory Compactor): VMA, VFA, binder content, aggregate gradation
•Performance tests (rutting, cracking) may also be included

How do you measure asphalt density and thickness?

•Density: Core samples (ASTM D2726) or nuclear gauge
•Thickness: Measured directly from extracted core depths

Laboratory Test Data

Cmt Services Laboratory Testing
What is a sieve analysis, and why is it done?

Sieve analysis (ASTM C136) determines the particle size distribution of soils or aggregates. It’s crucial for assessing gradation for concrete, asphalt, or base materials.

What is a sieve analysis, and why is it done?

Sieve analysis (ASTM C136) determines the particle size distribution of soils or aggregates. It’s crucial for assessing gradation for concrete, asphalt, or base materials.

What is the difference between Proctor and modified Proctor tests?

•Standard Proctor (ASTM D698): Simulates light compaction
•Modified Proctor (ASTM D1557): Uses higher energy to simulate heavy compaction, commonly used for roadway embankments

How do you determine soil compaction and density in the field?

Using a nuclear density gauge (ASTM D6938) to measure:

•Dry density
•Moisture content

Results are compared against Proctor values to determine percent compaction.

What is the acceptable strength deviation or tolerance range?

Typically:

•Average of 3 consecutive tests: ≥ f’c (design strength)
•Individual tests: no more than 500 psi below f’c for strengths > 5000 psi
•Projects may have stricter tolerances.

What’s the typical turnaround time for 7-day and 28-day break results?

•7-day breaks: within 24 hours after the 7th day
•28-day breaks: within 24–48 hours after the 28th day

Same-day reporting is often available upon request.

How is compressive strength determined?

Per ASTM C39, cured cylinders are placed in a hydraulic testing machine and loaded until failure. The max load is divided by the cross-sectional area to determine compressive strength.

Field Test Data

What is the procedure for casting and curing concrete cylinders?

Cylinders are cast in standard 6”x12” molds per ASTM C31. They’re stored in a curing box on-site for initial 24 hours, then transported to a lab for curing at 73°F ±3°F until break testing.

What is the procedure for casting and curing concrete cylinders?

Cylinders are cast in standard 6”x12” molds per ASTM C31. They’re stored in a curing box on-site for initial 24 hours, then transported to a lab for curing at 73°F ±3°F until break testing.

How do you handle failed tests or non-conforming materials?

•Immediate notification to the client/engineer
•Retesting or resampling if needed
•Non-conformance reports (NCRs)
•Root cause analysis and recommendations

Can you provide sample test reports or templates?

Yes, we provide standardized test report templates with:

•Sample ID, test type, method
•Results, specifications, remarks
•Technician and reviewer signatures

Complies with individual ASTM recommendations

How do you determine the frequency of testing on a project?

Based on:

•Project specifications
•Contract documents
•DOT or industry standards
•Engineer or owner’s quality control plan

What types of tests do you perform on concrete, asphalt, soil, and aggregates?

•Concrete: Slump, air content, unit weight, temperature, compressive strength

•Soil: Proctor density, Atterberg limits, sieve analysis, field density (nuclear gauge)

•Asphalt: Core density, Marshall/Superpave, binder content, gradation

•Aggregates: Sieve analysis, specific gravity, absorption, LA abrasion

Accreditations

Are your tests accepted by local or federal agencies?

Yes, all tests are performed to standards recognized by local, state, and federal agencies, including DOTs, municipalities, and regulatory authorities.

Do you participate in any proficiency or accreditation programs?

Yes, we participate in:
•AASHTO re:source proficiency sample programs
•CCRL inspections
•USACE – United States Corp of Engineers
•State DOT accreditations ensures quality and consistency.

How do you ensure your lab and technicians are certified?

Labs are certified through programs like A2LA, AASHTO Accreditation and CCRL.

Technicians hold certifications such as:
•ACI Concrete Field Testing Technician
•NICET (Soils, Asphalt)
•WAQTC or state DOT certifications

What standards or specifications do you follow (e.g., ASTM, AASHTO, DOT)?

We follow industry-recognized standards, including:

•ASTM International (e.g., ASTM C39 for concrete compression)
•AASHTO standards (common in DOT work)
•Project-specific specs (TxDOT, FAA, Army Corps, etc.)

When should material testing be performed during a construction project?

Testing occurs throughout the project lifecycle:
•Pre-construction: material submittals and mix designs
•During construction: field sampling and lab testing
•Post-construction: final testing for as-builts and quality verification

Responsibility

Who is responsible for performing material testing on a project?

A certified third-party testing agency typically performs the tests, though sometimes the contractor or the owner hires the testing firm. Engineers and inspectors review results for compliance.

Which materials are typically tested on construction projects?

Common materials include:
•Concrete (compressive strength, air content, slump)
•Soil (compaction, classification, density)
•Asphalt (density, gradation, binder content)
•Aggregates (sieve analysis, specific gravity)
•Steel/Rebar (tensile strength, bend tests)

What is construction material testing and why is it important?

Construction Material Testing (CMT) ensures that the materials used in construction (concrete, soil, asphalt, steel, etc.) meet required quality, strength, and performance standards. It helps verify compliance with project specifications and ensures long-term structural integrity and safety.