Plastic Limit Test Explained: How to Prevent Soil Failure on Site
🎥 Plastic Limit Test Overview
Purpose:
The Plastic Limit Test determines the lowest moisture content at which a soil remains plastic. It’s a critical parameter in classifying fine-grained soils and assessing their behavior under varying moisture conditions.
Standards Referenced:
- ASTM D4318: Standard Test Methods for Liquid Limit, Plastic Limit, and Plasticity Index of Soils
- AASHTO T90: Standard Method of Test for Determining the Plastic Limit and Plasticity Index of Soils
🧪 Equipment Required
- Glass Plate or Plastic-Coated Surface: Provides a non-porous surface for rolling soil threads.
- Moisture Cans: Used to determine the moisture content of soil samples.
- Spatula or Putty Knife: Assists in mixing and handling soil samples.
- Porcelain Evaporating Dish: For mixing soil with water.
- Balance (±0.01 g accuracy): Measures the weight of soil samples accurately.
- Oven (110 ±5°C): Dries soil samples to determine moisture content.
- Sieve #40 (425 µm): Ensures soil particles are of appropriate size for testing.
- Distilled Water: Used to moisten soil samples to the desired consistency.
🧪 Test Procedure
- Sample Preparation:
- Sieve the soil through a No. 40 sieve.
- Take about 20g of the passing soil and mix it with distilled water until it becomes a cohesive mass.
- Thread Rolling:
- Roll a portion of the soil on the glass plate into threads approximately 3.2 mm (1/8 inch) in diameter.
- If the soil crumbles at this diameter, it’s considered at its plastic limit.
- Moisture Content Determination:
- Collect crumbled pieces and place them in moisture cans.
- Weigh, dry in an oven for 24 hours, and reweigh.
- Calculate moisture content for each trial and average the results.
📊 Calculations
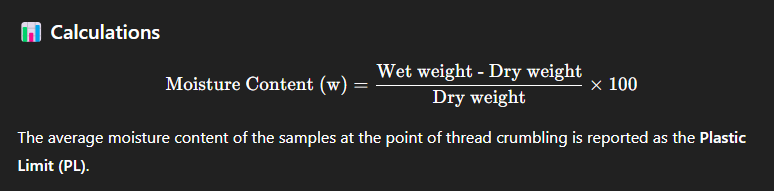
The average moisture content of the samples at the point of thread crumbling is reported as the Plastic Limit (PL).
📈 Interpreting Results
- Low Plastic Limit (<15%): Indicates silty or non-plastic soil.
- Medium Plastic Limit (15–30%): Typical for lean clays.
- High Plastic Limit (>30%): Suggests fat clays with high swelling potential.
These values are used to compute the Plasticity Index (PI): PI=Liquid Limit (LL)

🏗️ Engineering Applications
- Roadway Design: Determines subgrade suitability and need for soil stabilization.
- Foundation Design: Assesses compressibility and shrink-swell behavior.
- Slope Stability: Helps evaluate residual shear strength in cohesive soils.
- Soil Improvement: Guides chemical stabilization, such as lime or cement treatment.
For a visual demonstration of the Plastic Limit Test, you might find this video helpful: Atterberg Limit
Tests – Liquid Limit and Plastic Limit Test Procedure
Contact us today to build your next project.
Send an Email
Office
CMT
10665 Richmond Ave, Ste 190
Houston, Texas 77042
Hours
Mon-Fri: 7am – 6pm
Sat: 8am – 5pm
Sun: Closed
Communicate
Email: [email protected]
Phone: (832) 464-8334